
Adding Facelets Support to a Web Project
Facelets is a light-weight, framework backed by industry standard JavaServer Faces. Facelets provides a JSF-centric view technology without depending on JSP pages and focuses on templating, re-use, and ease of development. In this tutorial, you will learn how to:
- Create a web project with Facelets support
- Create a new Facelets XHTML page
- Deploy a sample Facelets project
This feature is available in MyEclipse.
1. Create a New Project with Facelets Support
Configuring a project with Facelets support provides your project with access to all Facelet libraries needed for development and runtime deployment. Also, Facelets code assist and validation is available to projects configured with Facelets support.
- Select File>New>WebProject.
- Type a name in the Project name field, and click Finish.
Note: This tutorial uses the JavaEE 5 version; however, JavaEE 6 or 7 is an available option when creating new projects.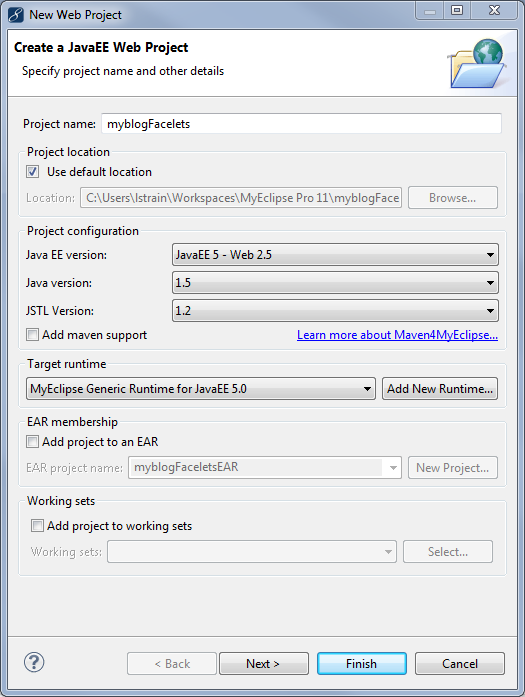
Creating a new Web project - Right-click the project, and select MyEclipse>Project Facets>Install Facelet Facet.
Note: If you are installing the Facelets facet to an existing JSF project, select Install Facelet Facet from the MyEclipse submenu. - Click Next to accept the default versions.
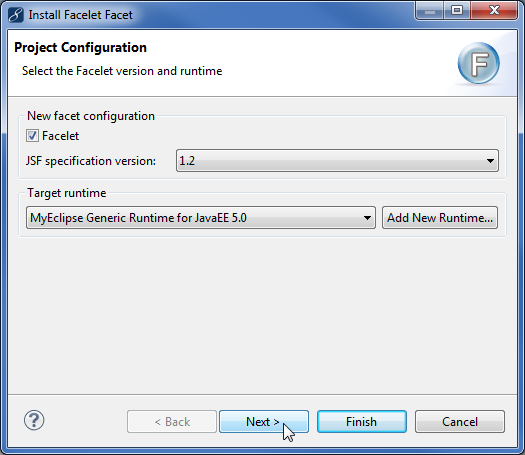
Adding Facelets support - Click Next to accept the default libraries, or Finish to create the project. MyEclipse modifies the project’s web.xml file and adds the appropriate entries for Facelets development.
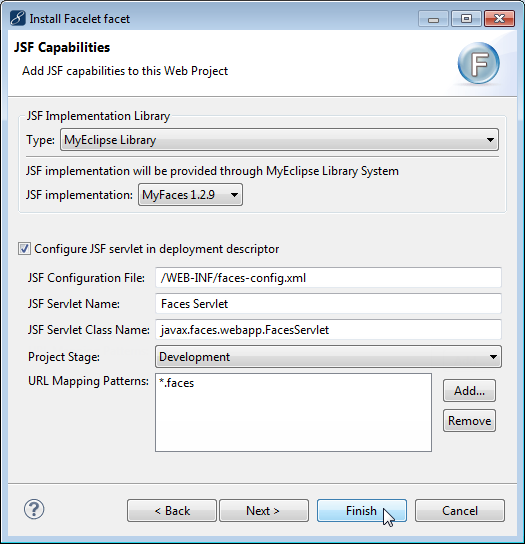
Accepting the default template file extension
2. Create an XHTML Facelet Page
After you configure a project with Facelets support, you can create Facelets XHTML pages using the XHTML page wizard and the MyEclipse JSF Designer. Facelet pages can be written either as XHTML or JSPX documents. In MyEclipse, to take advantage of all editing features, create your Facelet pages as XHTML.
- Select your project in the Explorer, and select File>New>Other. Type xhtml in the Wizards field, and select XHTML (Advanced Templates).
- Select Default JavaServer Facelets template from the Template to use drop-down, and click Finish. The file opens in the JSF Designer.
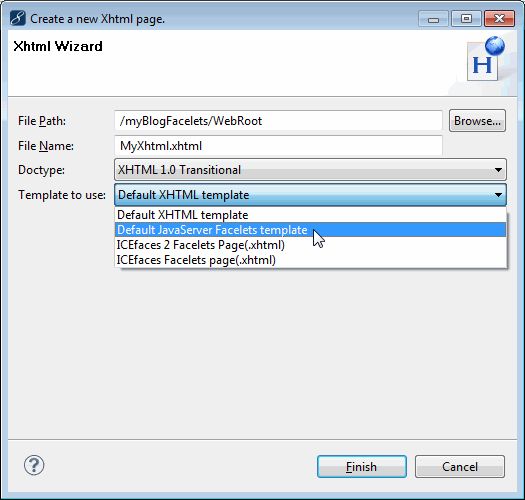
Selecting the Facelets template
The MyEclipse JSF/Facelets Designer features include a drag and drop palette, split view source/design, and related toolbar, which is found on the MyEclipse toolbar. The palette has JSF HTML and Core library support as well as the subset of JSTL supported by Facelets.
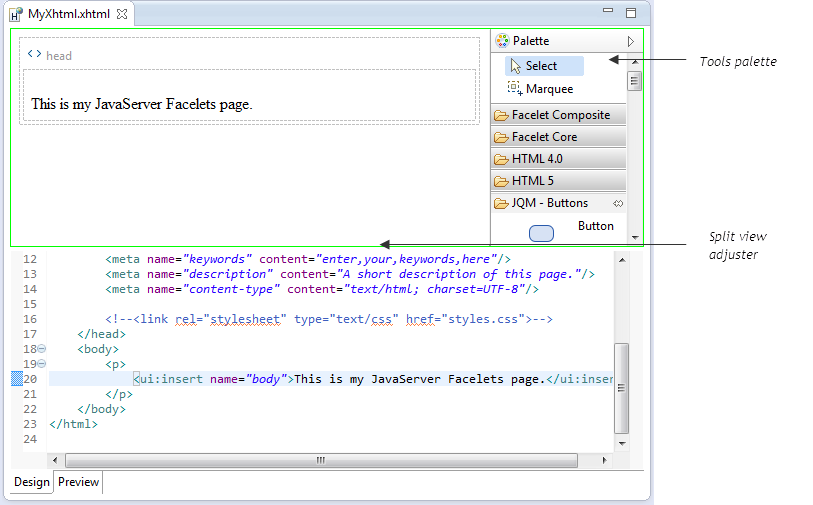
JSF Facelets Designer
3. Installing the Facelets Demo Project
- Download MyBlogFacelets.zip, and save to a folder on your hard drive.
- In MyEclipse, open the Servers view by selecting Window>Show View>Servers.
- Select the MyEclipse Derby server, and click
 on the Servers view toolbar.
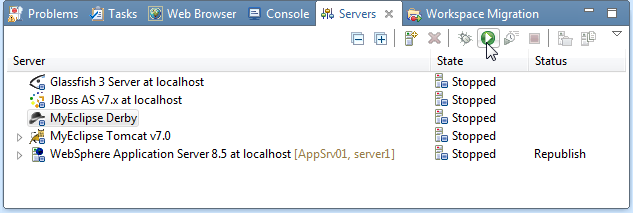
Starting the MyEclipse Derby server - Select File>Import, expand General, select Existing Projects into Workspace, and click Next.
- Select the Select archive file option, browse for and select the downloaded archive file, and click Finish to import the demo project.
Note: This project has JPA support that is already configured for using the integrated MyEclipse Derby database and included sample schema MYBLOG. Read the JPA tutorial for more information on JPA support in MyEclipse. - Because this project was created with an older version of MyEclipse, a Project Migration wizard opens. Follow the steps in the wizard to migrate the project.
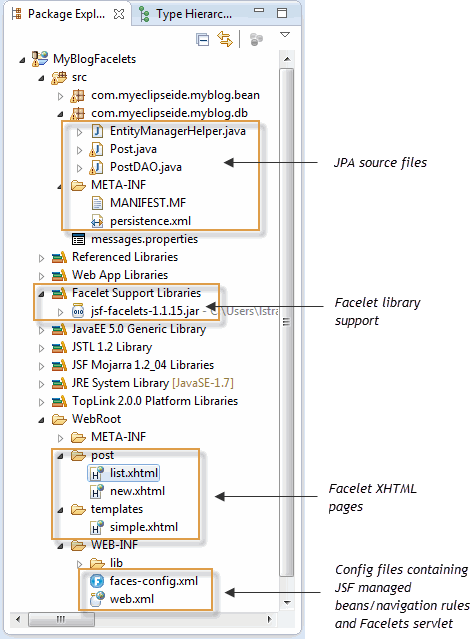
Project structure
4. Deploying the Project
- Right-click the MyEclipse Tomcat server in the Servers view, and select Add/Remove Deployments. Select MyBlogFacelets from the Available column, click Add, and click Finish.
- Click
 on the Servers view toolbar.
 - Expand the server to see the projects deployed, right-click the MyBlogFacelets project, and select Open in Browser to test the application.
5. FAQ
I’m getting strange deployment errors in Tomcat. What is wrong?
There is a bug with some versions of Tomcat 5.x/6.x with the JSF 1.2 RI. If you are using this combination, please read the technical notice for more information.

